One of the most common cosmetic interior problems with these cars is the headliner sagging. The originals were essentially foam sprayed onto a backing board, and then a piece of cloth glued onto that. After time, the glue fails, and the cloth comes down. Worst case, the foam starts falling out in a big dusty, chunky mess. The Grey Car was not immune to the problem. (This was done a long time ago, so I’m not including this fix as part of its story!)

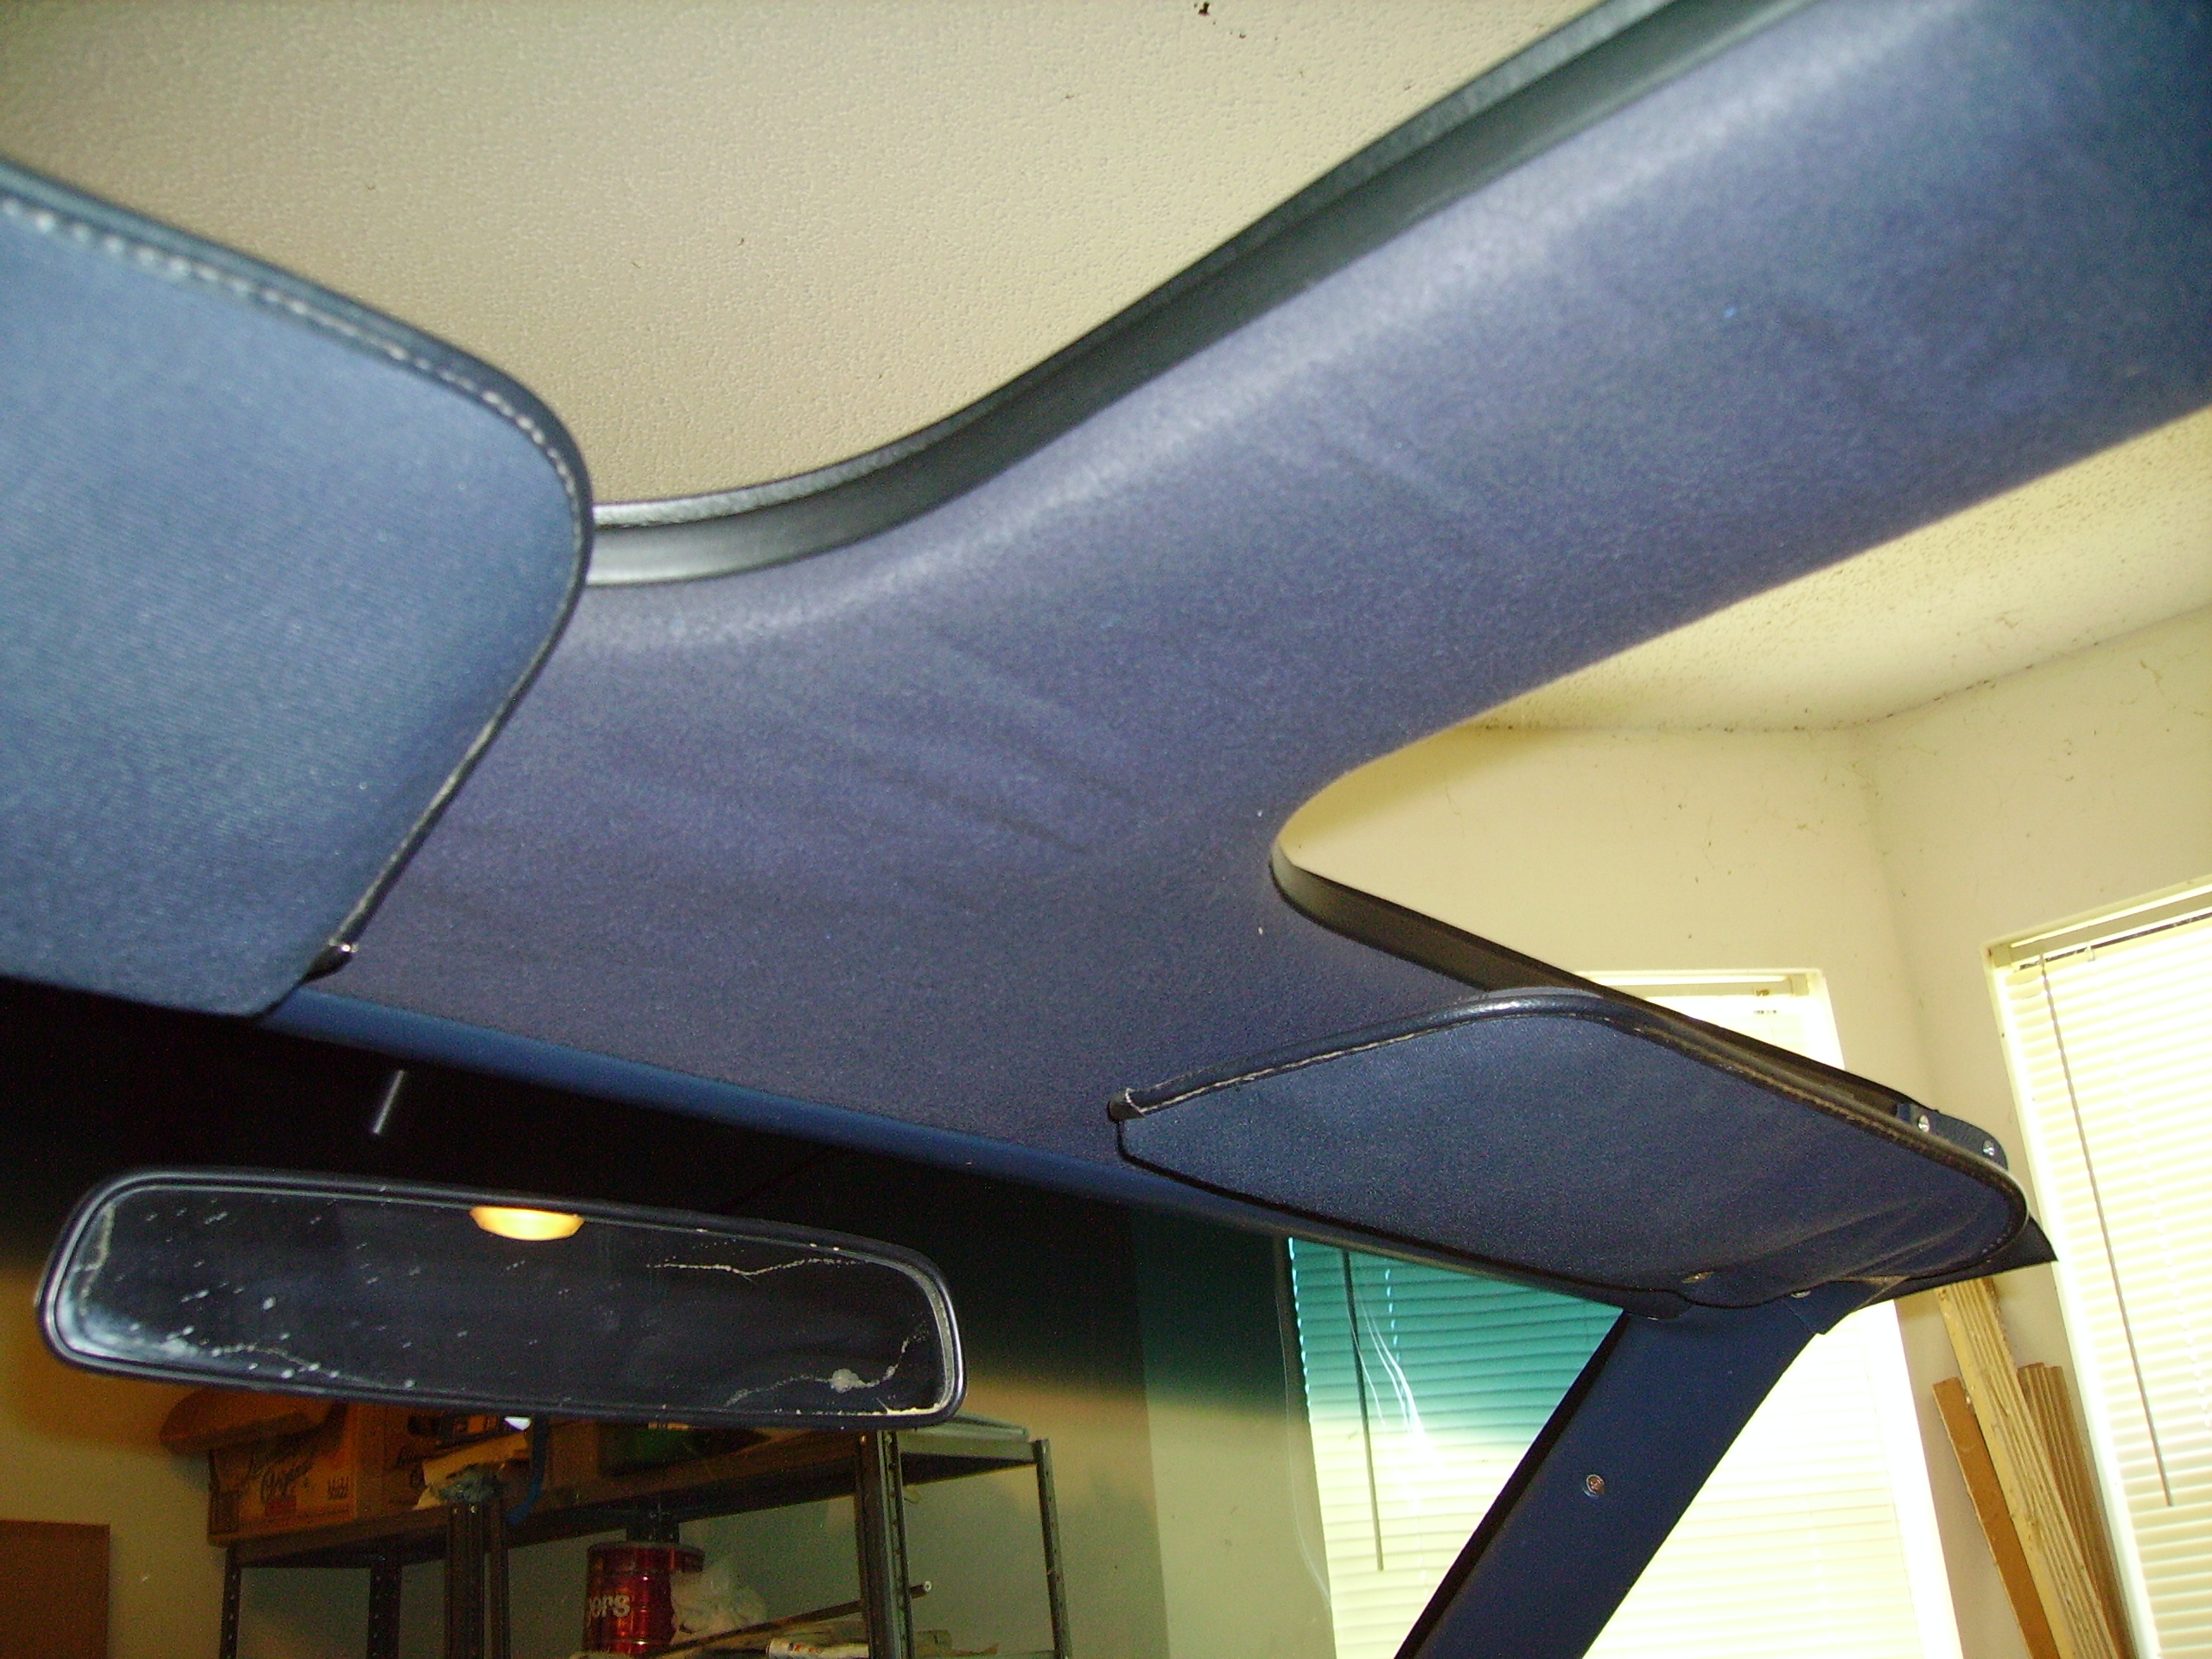
Compounding the issue was the presence of the aftermarket Cars & Concepts T-Top installation. Cars & Concepts made aftermarket t-top and sunroof kits for various cars back in the day. You could get them put in at body shops, sunroof shops, or even at the dealer after your car arrived. Unlike the factory Fisher body t-tops, which used plastic trim pieces around the interior roof, leaving only a small portion of the headliner over the back seat, these used the original headliner, cut and tucked around the opening. I had to do the same thing.
Luckily, the new replacement headliner made this a relatively easy task, and we’re going to see what had to be done to make it happen.
1. Remove trim, lights, visors, etc. and t-top trim.
Now, I didn’t take as many photos of this process as I should have. You need to remove all the interior bits that are either holding the headliner up, or are attached to it. This includes: The rear sail panels, the trim over the rear window (watch that clip!!), visors, lamps and bezels, and carefully remove the “cap” that goes around the t-top opening. You’ll need to remove the corner pieces where the t-tops clamp onto the body. Carefully, as they’re basically unobtanium at this point.
2. Remove the old headliner
Just yank that puppy down and try not to breathe in that nasty stinky old foam that’s soaked up 30+ years of, well, God only knows. Be careful of wiring for the map light and visor makeup mirror light if you’ve got one.

3. Prepare the new headliner
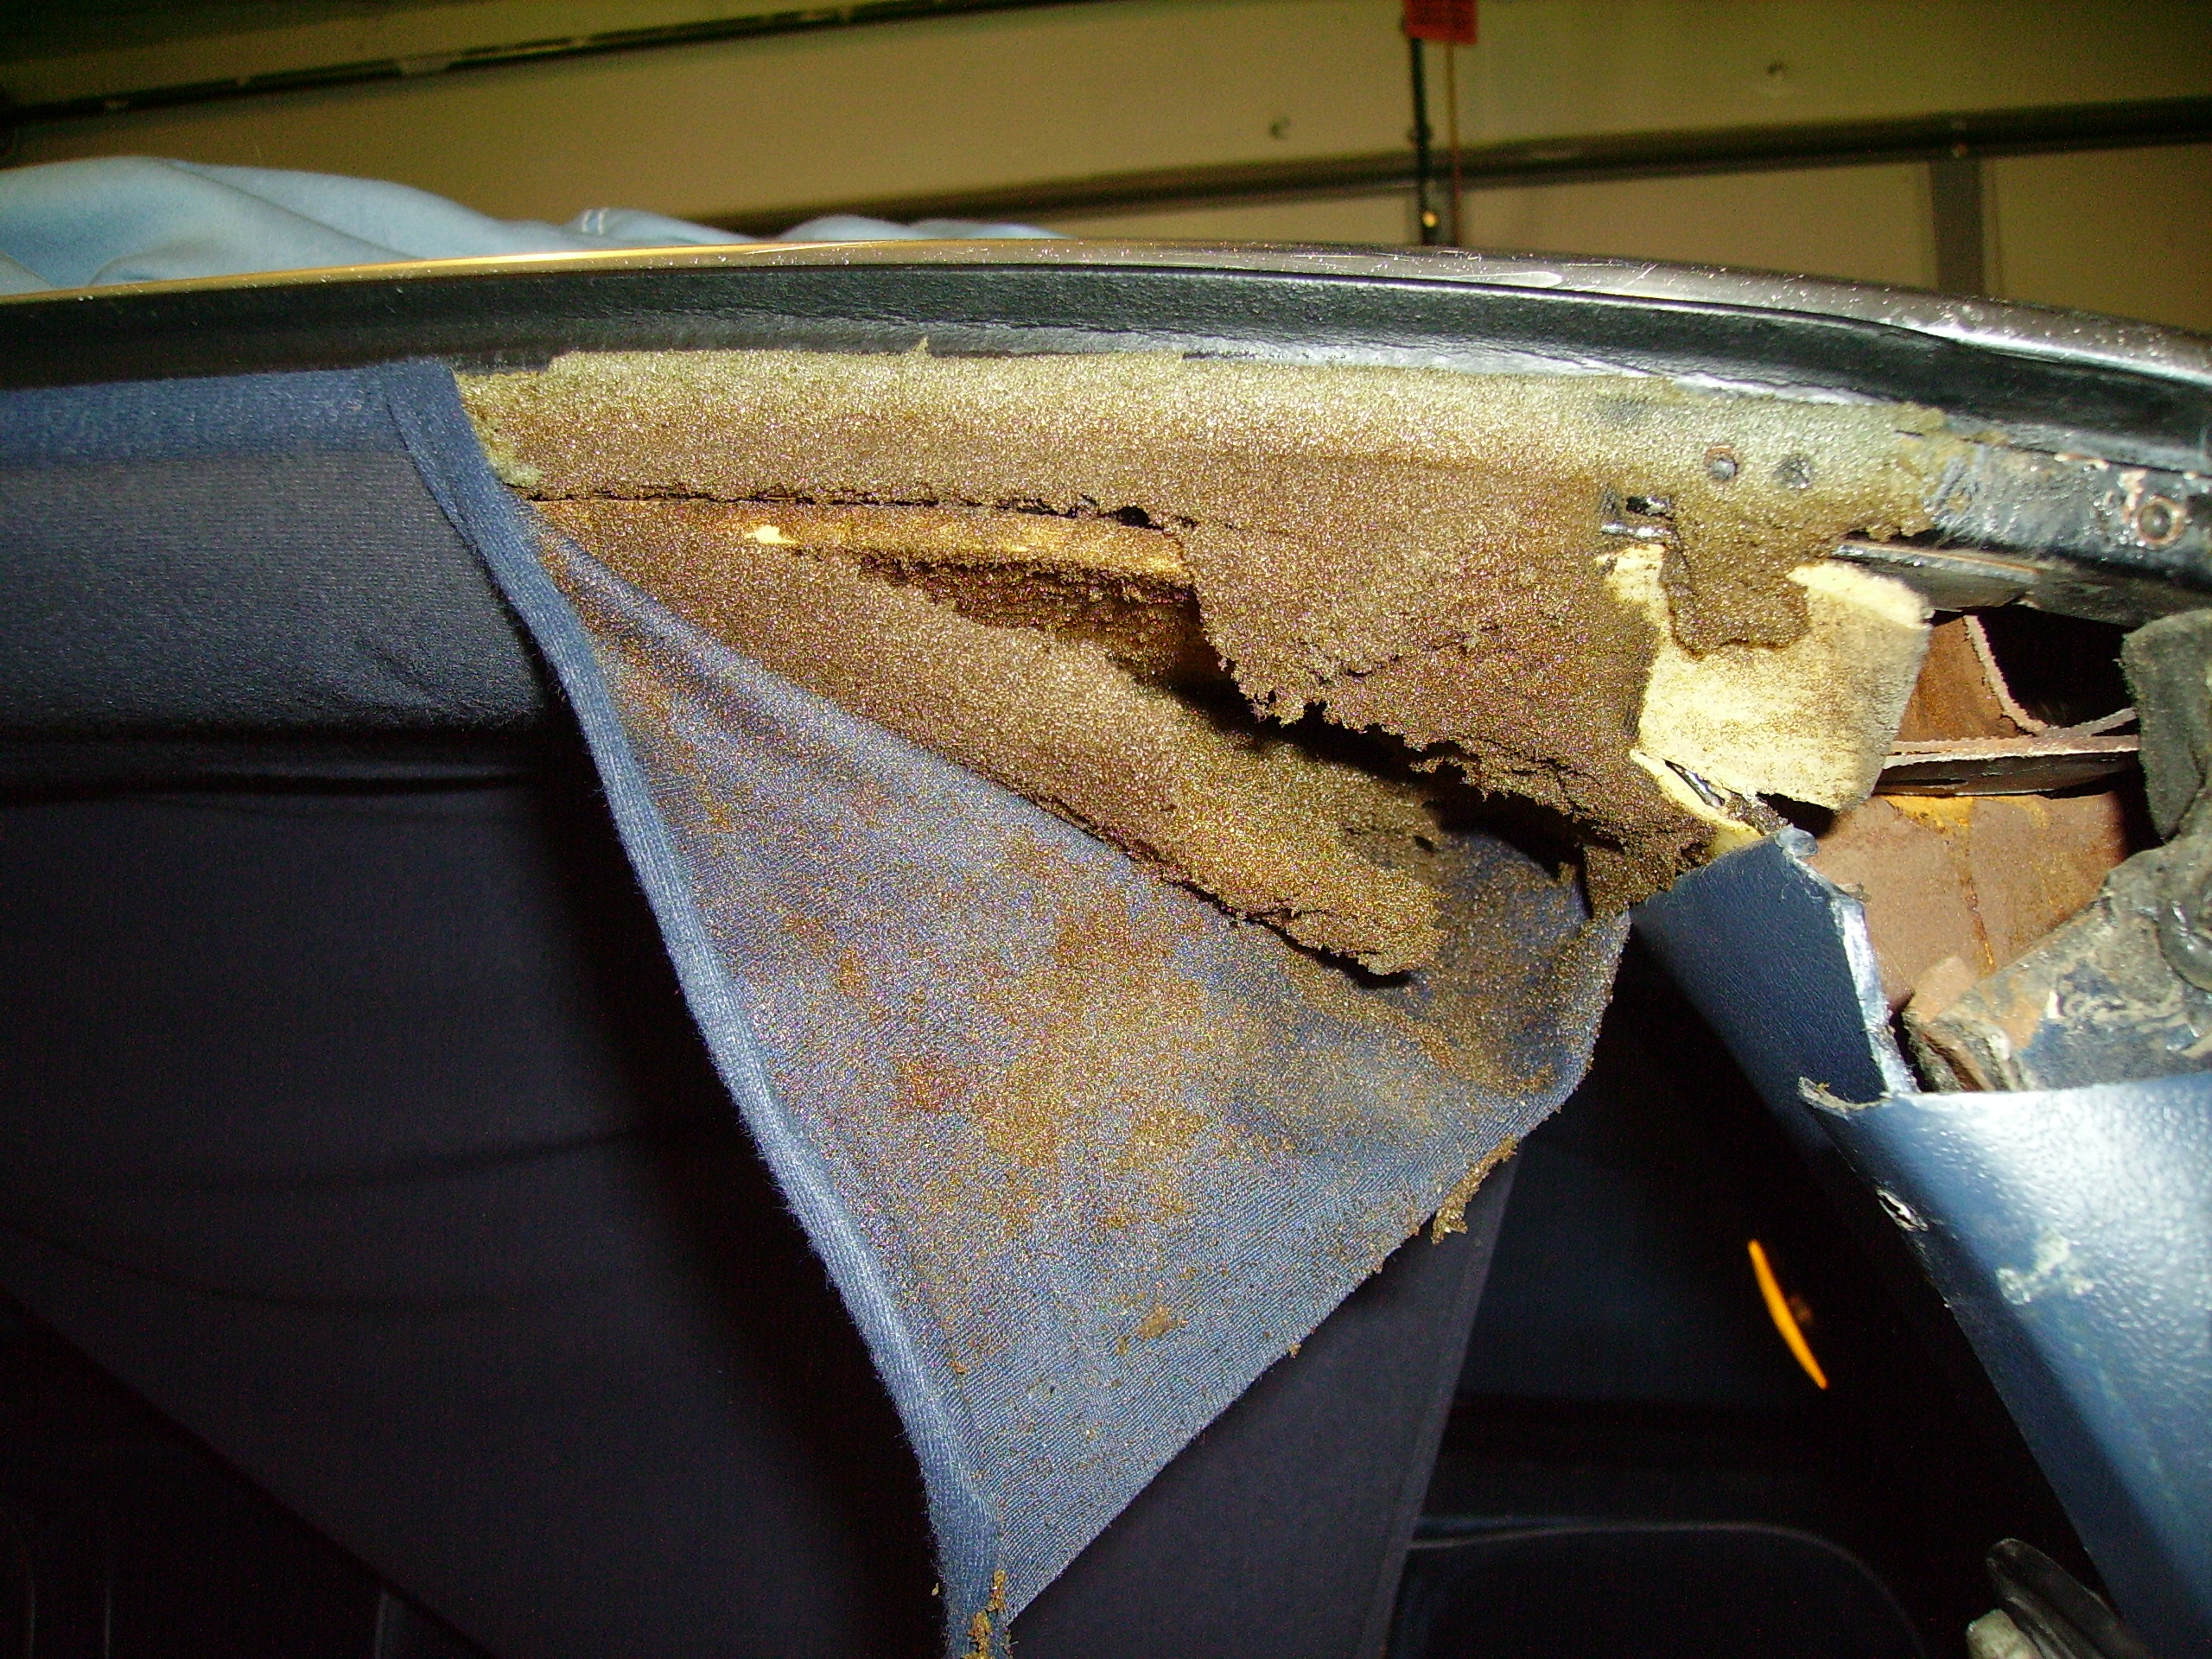
The new headliners are much better constructed, basically cloth over a bit of padding material, glued to a piece of ABS plastic. It will arrive in a HUGE box, and you’ll want to make sure you unroll it and let it take its proper shape at least the day before you start this project.
While you’re waiting, now would be a good time to clean out the drip channels, remove that center exterior trim piece, mask it all off and spray a fresh coat of matte or satin (not flat or gloss!) black in the area between the tops, just to freshen it up. Don’t tear up your weatherstripping, because, yup, you guessed it, unobtanium. (If you know where to get some, please let me know! And yes, it’s quite different from the factory rubber.)
4. Install the new headliner
Getting the new headliner in the car isn’t as easy as you’d think. The ABS backing is flexible, but still pretty rigid. A little finessing and it’ll finally get there.
Once its in place, you can put most, if not all of the interior trim back into place, since most of that is what holds the thing up. If you broke any of those clips (and you probably did) like the one over the rear window, you can get aftermarket replacements easy enough, or you can just go “good enough” if it will stay, like I did. Yes, I should fix it properly!

5. Cut out the t-top sections
How you do this is up to you, but you need to cut out the openings for the t-tops, BUT…. Make sure you leave a couple inches to spare. Don’t make this cut all the way to the edge of the opening. You’ll see why in a minute. If you do, you’ll be kicking yourself when you go to order another new headliner.
How you do this is up to you. The ABS is pretty stout stuff, I wound up using a rotary cut-off tool after a utility knife proved too much work (and hard to control so not to go through the fabric on the 2nd cut.) Maybe there’s a better way, but that’s what I did.

6. Cut out the backing board around the edges
Now its time for the second cut. This time, ONLY cut the ABS backing material, take great care NOT to go through the actual material. You want to end up with something like this. Ideally you’ll leave all the fabric intact so it looks nicer.

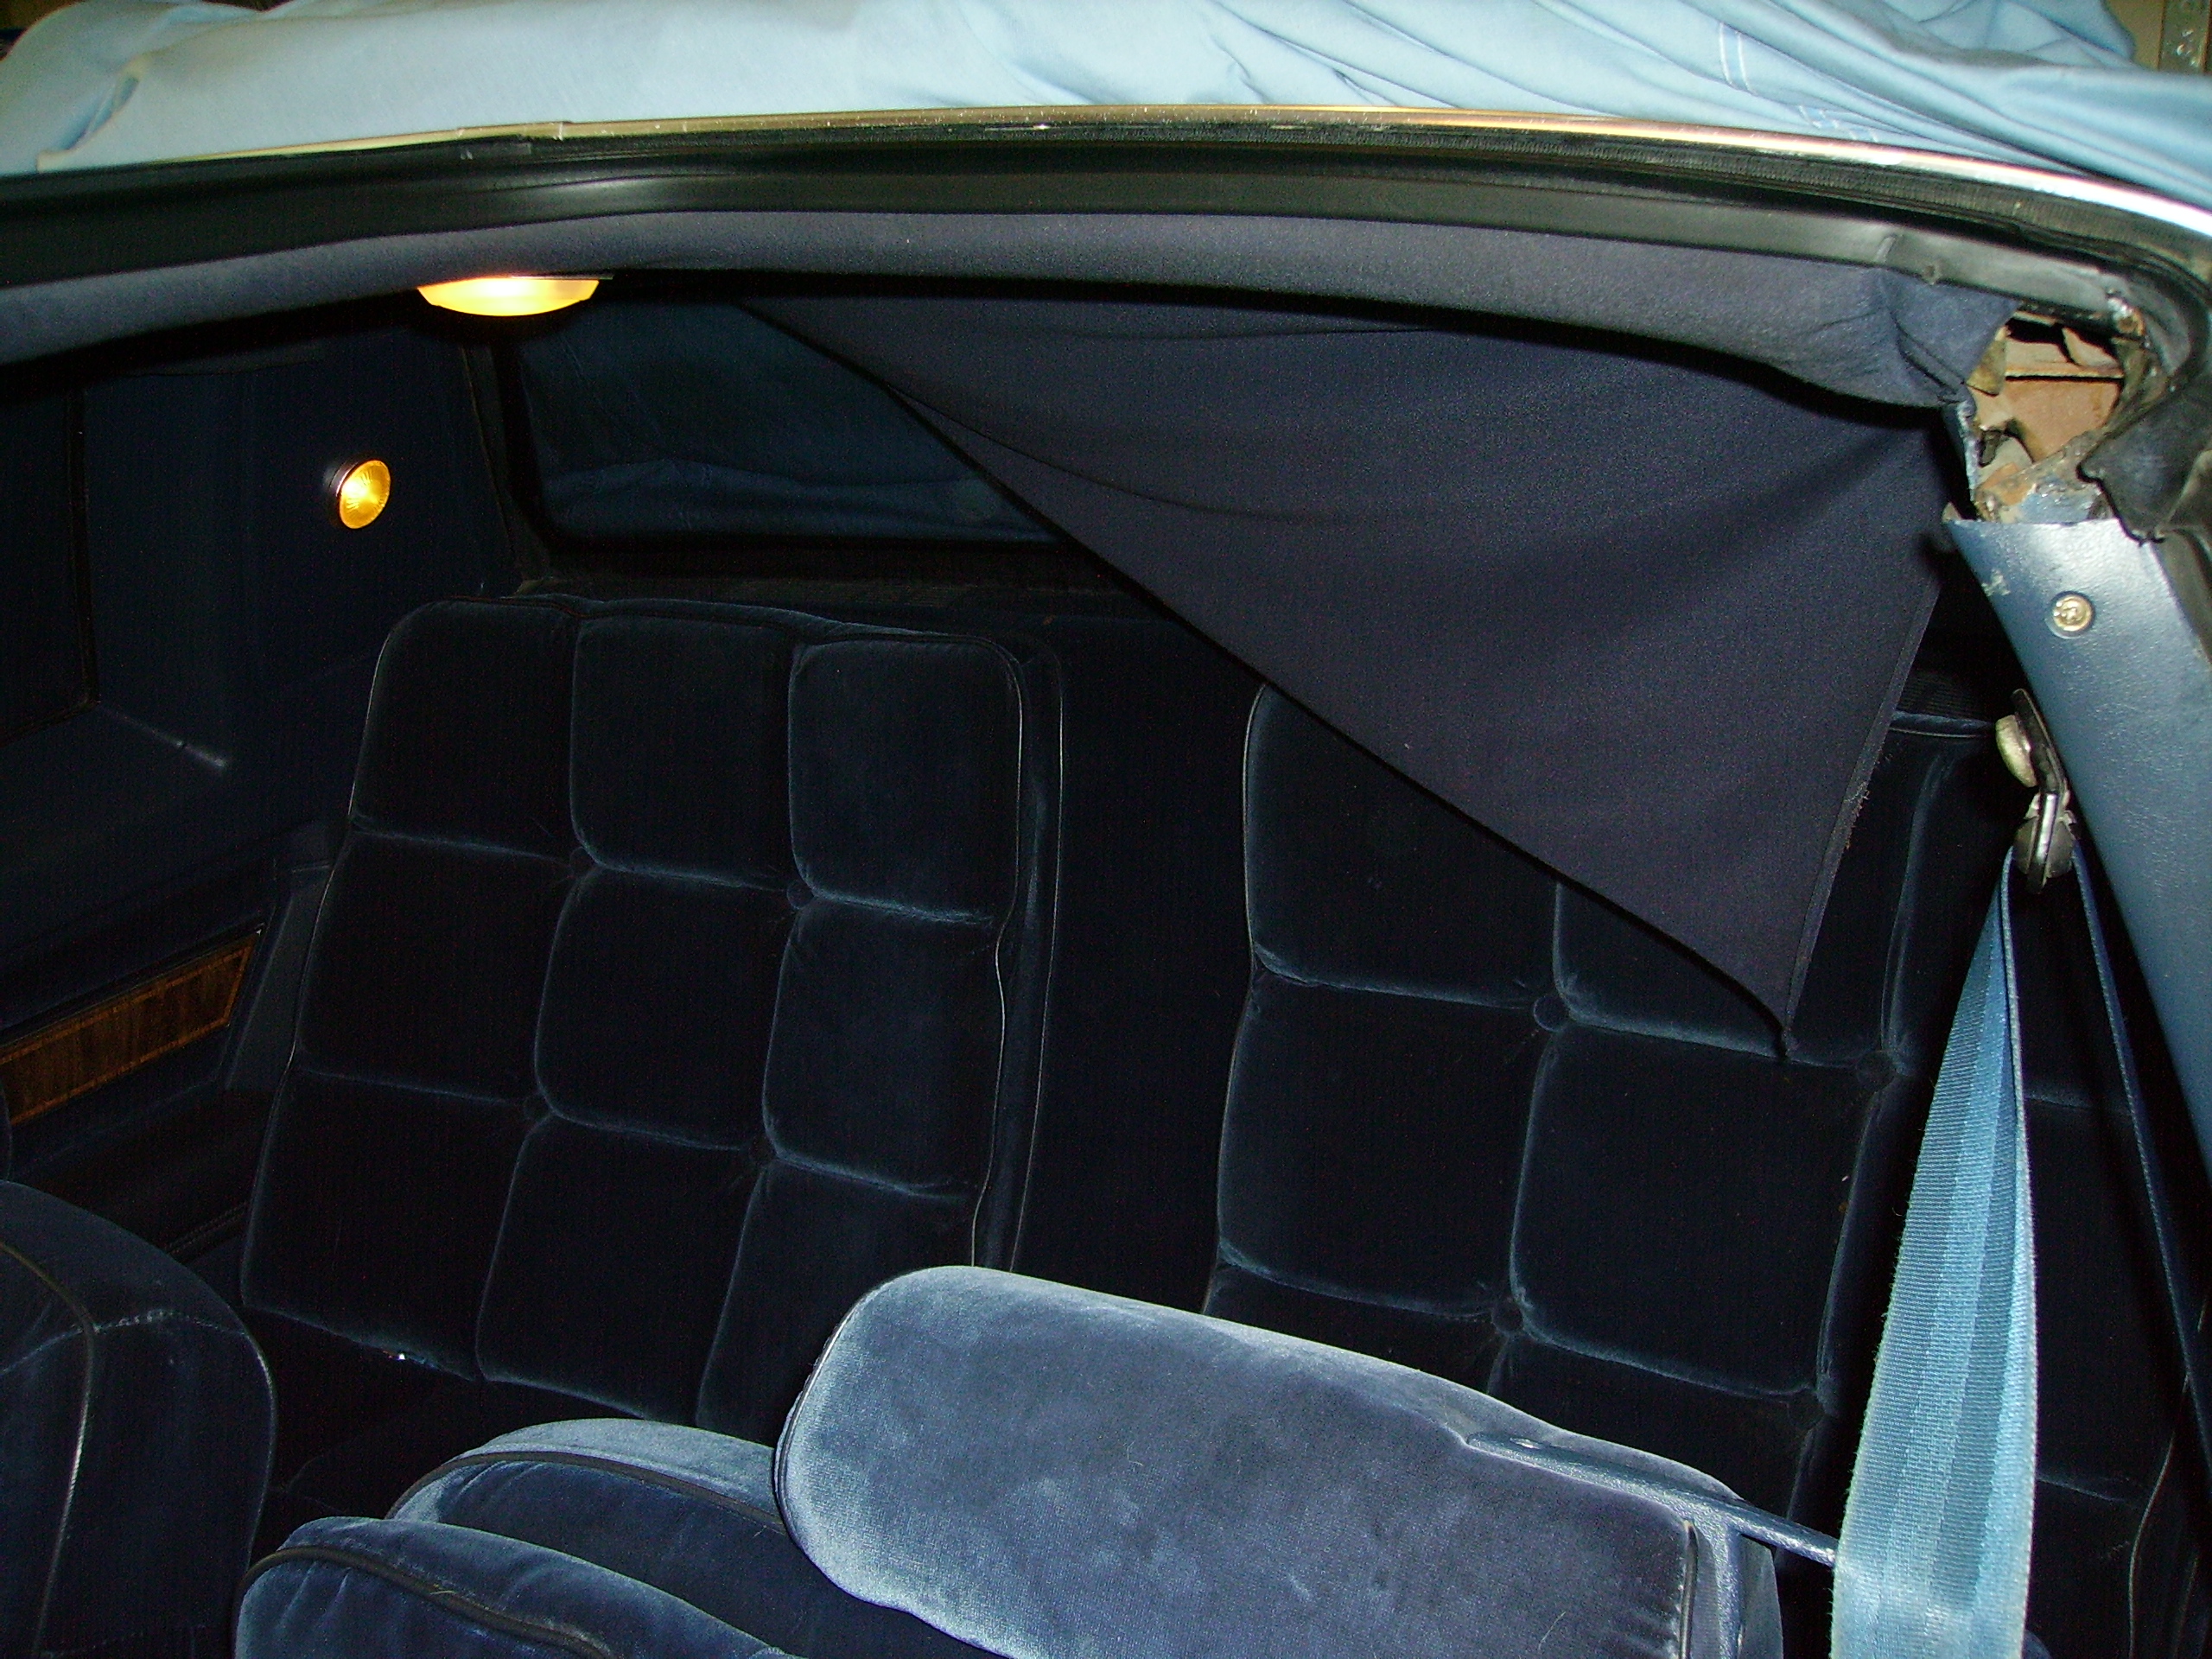
7. Fold and tuck the headliner into the opening
Once you’ve made this cut, you can take the material and fold it up, then tuck it down into the channel. Don’t pull too hard, or you’ll tear it up. This is why you needed that extra couple of inches.
8. Reinstall the t-top trim
That black plastic “cap” that you oh-so carefully removed earlier (also unobtanium) goes back around the edges, pinning the material down and making it look like a pro did it. You should go back around the outside of that cap (into the drip channel / roof area) and carefully remove any excess material that is peeking out from under the cap. Should it get wet, you don’t want it wicking the moisture up into the headliner.

9. Enjoy your new headliner!
After you vacuum all the old foam and bits of material out of your car, jump in and breath in the fresh air of a non-sticky, no-foam-dust headliner! Time will tell how these ABS backed headliners hold up over the long run, but it should last long enough to make the fix well worth the effort.

This t-top headliner repair process is probably just as valid for any aftermarket sunroof installation, or even the factory sun/moon roof cars, since they’re fairly rare and I don’t think anyone makes specific headliners for that application. Turns out they actually do!
Parts and tools you’ll need:
- Headliner
- Replacement clips
- Cutting tool
- Heavy Scissors
I have a trans am 80 i male a complete restoration and i need rubber molding of cars and concepts f-87 t-top can you have it for me or can you reffer me anybody can have those moldings
I need the parts that the tops latch on to..where can I find them?